
About the Structure and Installation of the Hay Rake
Hay rake is a grass harvesting machine that integrates scattered grass on the ground into grass strips. The purpose of grazing is to make the grass fully dry and facilitate the collection of hay.
So we will introduce the structure and Installation of hay rake to you in detailed:
1. Structure of the hay rake:
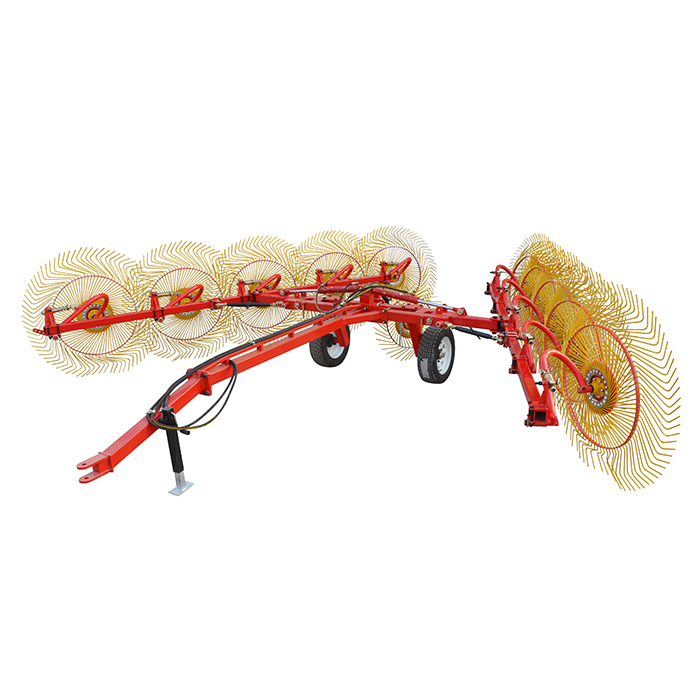
The hay rake mainly consists of a frame, left and right brackets, stretching components, left and right rocker arms, finger plate frame, finger plate, and lifting cylinder.
Finger plates are usually symmetrically arranged from left to right, which can be used to raking grass. The frame is the main body of the rake, with its upper suspension seat and lower suspension pin connected to the tractor suspension device, and the left and right rocker arms hinged on the curved adjustment plate. There are many holes on the adjustment plate that can change the angle of the rocker arm, thereby adjusting the working width. The rocker arm, main bracket, and finger plate bracket are all connected with bolts. Due to the large gap, the machine can have good copying performance.
2. Installation of the hay rake:
Since the hay rake is packaged as components when it leaves the factory, the user needs to assemble it himself. When installing, be careful not to install left and right parts and front and back parts in the wrong way. The installation steps are as follows:
1) Place the frame flat on the ground, connect the left and right rocker arms to the frame using connecting shafts, insert the short bending pin into the third hole of the curved adjustment plate, and install the spring pin;
2) Install the stretching component on the frame, secure it with a safety pin, connect the pull rod to the left and right rocker arms, hang the tension spring hook in the second hole of the stretching adjustment plate, and install the split pin;
3) Assemble the rocker arm with the main bracket, insert the long bending pin, and note that the bending direction of the main bracket should be backward;
4) Install the front and rear finger trays on the main bracket, fix them with bolts, and pay attention to the backward direction of each bent beam;
5) Install the left and right finger plates separately on the finger plate shaft. Firstly, place an amplitude plate washer on the finger plate shaft, then install a bearing coated with butter, then install the finger plate and amplitude plate washer, and then install the locking plate and tighten it with bolts; The left finger plate must be installed on the left side of the machine, and the right finger plate must be installed on the right side of the machine. It cannot be installed upside down, otherwise it will not achieve the effect of grabbing grass. After installing the fingerboard, pull it by hand and it should rotate flexibly without getting stuck or bumping;
6) Remove the two long bending pins, rotate the frame, insert the long bending pins, lift the frame, install the support rods, and insert the spring pins.